In this article, we will look at how to create a Gutenberg block from scratch using the official @wordpress/create-block tool provided to us by WordPress. We will also take the time to understand the various files generated using this tool. What each file does, and how they interact with each other.
Once you understand the various files and how they work, it would become a breeze to put up a new block structure with or even without the @wordpress/create-block tool. Then the limit to what you can do with a block is limitless.
Prerequisite Knowledge for Block Development
You need to have some experience with WordPress plugin development. You should understand WordPress hooks and filters and generally how WordPress works under the hood. The file and folder structures of themes and plugins and how they interact with each other. You do not need to be an expert but having some development experience would go a long way.
You should have knowledge of JavaScript, particularly the ES6 version that brings new features and functions that are also used by React.
You will be using the React framework to write your Gutenberg blocks, so having proficiency in that language along with JSX is very helpful.
And understanding of the modern development workflow, and command line tools like NPM (Node Package Manager) that make installing and uninstalling development packages into your applications a breeze.
Tools You Need to Get Started with Gutenberg Development
Some of the tools you need to get started with Block development. Ensure that you have them installed on your system before moving ahead with the actual development process, as these tools are essential.
NodeJS & NPM
The first thing you need is the latest LTS (Long-term support) version of NodeJS installed on your system.
If you happen to be Windows, you can download the free edition of the Chocolatey package manager to install NodeJS and other software packages on your machine too. Just copy the script provided on the Chocolatey installation page. Open your Windows PowerShell by right-clicking on it and choosing, “Run as administrator”. Paste the copied script and hit enter. This should install Chocolatey on your machine.
Then you can run the command below to install the latest LTS version of Node.
choco install nodejs-ltsOr you can also directly download it from the NodeJS website and install it manually using the installer provided.
Once you install Node, it will automatically install NPM too. Check that NodeJS and NPM have been installed successfully by using the node -v & npm -v commands.
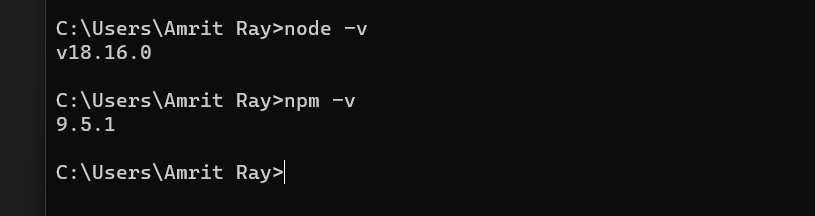
You should see a version printed out for each of the packages.
Local Development Environment
You need to have this set up as you need to be able to preview your WordPress site during development. WordPress needs PHP and a database like MySQL or MariaDB database engines to spin up a WordPress site for you. You need a local webserver to create a server-side environment that can run PHP and host a local database.
Some of the popular WordPress development environments include:
- XAMPP
- MAMP
- Local by Flywheel
- Vagrant
- Instant WP
These create an environment that can run WordPress locally on your machine, which can then be used for development purposes. Ensure you have setup WordPress locally on your system after having setup a local development environment.
IDE for Writing Code
You need an IDE (Integrated Development Environment) to write your code. Simply put, it is the editor you use to write your code with. There are many available options for you to choose from. And, honestly, any IDE of your choice will do that job. I will be using Visual Studio Code for the purpose of this tutorial.
Some of the IDEs you can choose from include:
With all the necessary tools set up, now we can dive into creating our block. Let’s get started.
Creating Our Gutenberg Block
We will use the @wordpress/create-block command tool to create the scaffolding of the plugin, consisting of the necessary files & folder structure that registers the block and sets it up for us to customize as needed. The tool will also register the block with WordPress so that we can start using it instantly. Let’s see how it works out of the box.
Since we are essentially creating a plugin for WordPress, we will create our new block inside the Plugins folder of your local WordPress installation. The path to my local WordPress Plugins folder is located at: C:\WPDev\wp-content\plugins
We will navigate to this folder in our command prompt by using these commands:
cd\
cd WPDev\wp-content\plugins
Let’s call our practice block Ray Design Block. Therefore, we will run the following command to create our new block.
npx @wordpress/create-block ray-design-blockYou will get a screen like this if everything completes successfully.
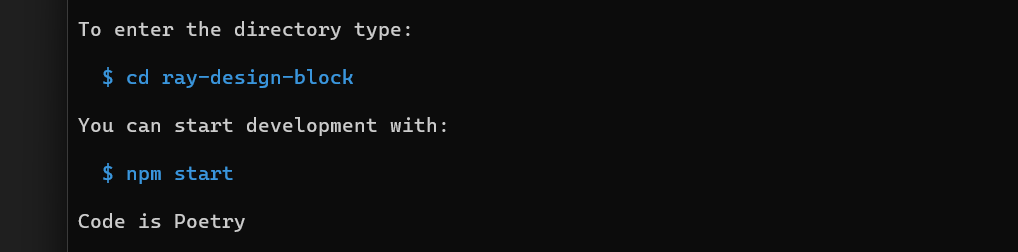
So now your new block is ready. There should be a new block folder named ray-design-block placed in your local WordPress Plugins folder. Before doing anything else, let’s first change the namespace of the plugin, so that it does not conflict in anyway with the other plugins or blocks that we may have created using the command.
Therefore, open the folder with your preferred IDE. I am opening it with Visual Studio Code. Open the file block.json and change the name property value from this:
"name": "create-block/ray-design-block",to
"name": "rayds/ray-design-block",We just changed the namespace from create-block to rayds. We did it to ensure that the namespace does not clash with other blocks that you have created with this @wordpress/create-block tool.
Now navigate to your local WordPress Dashboard and activate the plugin. It should activate without any errors. Navigate to any page of your liking and search for the block and as you can see it shows up promptly in the suggestions.
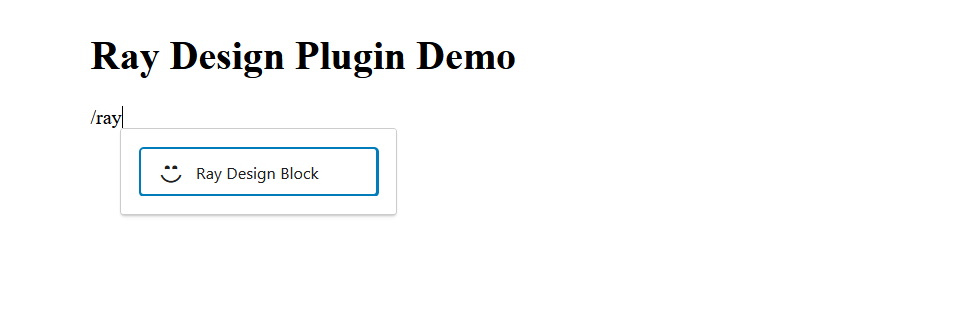
So now we can go ahead and add it to the page and save/publish the page. It will display one message on the edit screen and another message on the front end of the site, i.e. when the page is viewed on the browser. So our plugin is working exactly as it is intended.
Understanding What Each File Does in Our Block
As we have already opened the folder in Visual Studio Code, let’s go through the files and folder structure here:
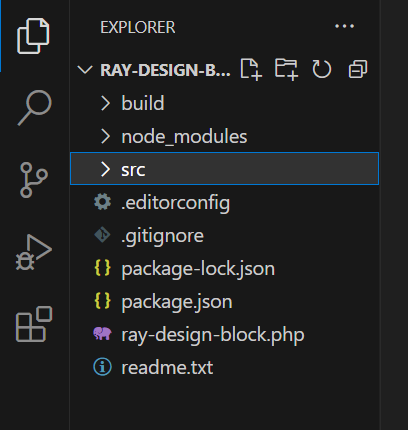
The Build Folder
It contains all the compiled files from the src folder. The build folder contains the files that are finally published to the web and are part of the final plugin. It contains the files generated after the final build. The other files are not needed for the plugin to work when finally deployed.
The node_modules folder
It is added as a development dependency when the plugin is created. It contains all the modules & scripts needed during the development phase. We don’t change anything here.
The src folder
It is the source folder where we place all our working code in. All the files and folders we create during development goes inside this folder. It then ultimately gets complied and the resulting files placed in the build folder. We will take a deeper look into the various files that this folder contains in a while.
The .gitignore file
As the name suggests, it contains list of folders and files that should be ignored when committing the files to the Git repository. For example, the node_modules is a very large folder, and there is no reason to save it to the Git repository with your project. When someone else fetches your project from GitHub to work on it on their system, they can simply run the command npm install to install node_module and the necessary packages automatically from the net. Therefore, it simply contains a list of files and folders to be ignored by Git.
The package.json file
It is a file that basically keeps a track of the packages installed in your application. It keeps track of packages that are needed to run your application, as well as packages that are needed for your development environment setup. The packages themselves typically don’t get committed to Git. So anyone working on a different system can conveniently run the command npm install to install all the packages listed in the package.json file.
The ray-design-block.php file
This the main PHP file for your plugin. It is named after your plugin, as you can tell. It registers the block on the server side by pointing to the path where all the block information is stored in one centralized file, called block.json file.
function create_block_ray_design_block_block_init() {
	register_block_type( __DIR__ . '/build' );
}
add_action( 'init', 'create_block_ray_design_block_block_init' );
The create_block_ray_design_block_block_init function is called on the WordPress init hook and registers the block on the server side.
The register_block_type function simply points to the directory where the block.json file can be found. You can also pass this function the exact path to your block.json file too.
Looking Into the SRC folder
This is perhaps the most important folder where all the action happens. This is the folder where we place all our source files. So let’s take a peek into the important files we have in this folder.
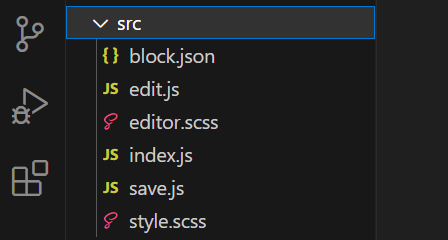
The block.json file
This is a very important file indeed. It holds all the information regarding your block in a centralized location. Earlier, you had to add the information both in the main PHP file and also in the main index.js file. So the information was being duplicated. Now, both files can fetch the block related information from block.json file directly.
{
	"$schema": "https://schemas.wp.org/trunk/block.json",
	"apiVersion": 2,
	"name": "rayds/ray-design-block",
	"version": "0.1.0",
	"title": "Ray Design Block",
	"category": "widgets",
	"icon": "smiley",
	"description": "Example static block scaffolded with Create Block tool.",
	"supports": {
		"html": false
	},
	"textdomain": "ray-design-block",
	"editorScript": "file:./index.js",
	"editorStyle": "file:./index.css",
	"style": "file:./style-index.css"
}
Along with the block name and API version, it also lists the path to stylesheets and the location of the main JS file for the editor.
The editor.scss & style.scss files
Also sometimes called Sassy CSS, these are basically style sheets where you can declare variables and use nested CSS rules. These style sheets cannot be read or interpreted directory by the browsers. Therefore, they are never published as it is. Here out of the box with zero configuration, these SCSS files get compiled to a regular CSS file by the @wordpress/scripts package, which is then used by the block to render normal CSS that the browsers understand.
The editor.scss file holds the styles meant for the editor screen. And style.scss holds the styles for the block when it rendered on the frontend of the site.
The index.js file
This file registers the block on the client side. This is the main script file that the block uses for the editor. All the logic for displaying the block in the editor, saving data, fetching the saved data, and updating the saved data are all handled by this JS file.
import { registerBlockType } from '@wordpress/blocks';
import './style.scss';
import Edit from './edit';
import save from './save';
import metadata from './block.json';


registerBlockType( metadata.name, {
	edit: Edit,
	save,
} );
Instead of writing the Edit and Save function into the same file, they have been separated out into their own files or components. Then they are imported into this main JS file, as you can see from the imports above.
The block information from block.json file is also imported as metadata object, which is then used to register the block client side.
The registerBlockType function takes two parameters.
First it takes the name of the block, which is being fetched from the metadata object by referencing its name property, by using metadata.name.
Second, it takes an object with functions to handle the edit screen, and a save function for saving the data into the database.
So basically, it says, for edit, we have the Edit component. And for save, we have the save component.
Notice that for save, we use the shortcut notation, as the property and the value are both lowercase save here. You will see this when we inspect the save component later.
The edit.js file
One of the most important files in Gutenberg block. This file contains the Edit function that controls the edit view of the block in the editor.
import { __ } from '@wordpress/i18n';
import { useBlockProps } from '@wordpress/block-editor';
import './editor.scss';

export default function Edit() {
	return (
		<p { ...useBlockProps() }>
			{ __(
				'Ray Design Block – hello from the editor!',
				'ray-design-block'
			) }
		</p>
	);
}
The first thing we import is the __ from @wordpress/i18n (package dealing with internationalization) that retrieves the translations for the site.
Next we import useBlockProps which is used on the block wrapper element. This function simply adds the extra classes needed for the proper internal functioning of the Gutenberg block. I believe it should only be used with API version 2 and above.
Then we have the main function Edit() that simply returns the string, “Ray Design Block – hello from the editor!“
It displays in the page editor like this:

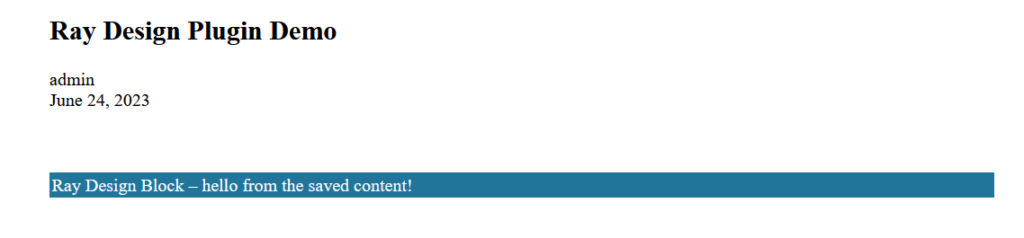
The save.js file
We now look at the last file of the plugin. The content saved by the save.js function is what displays in the frontend of the site. That is, on the public facing view of the page. Let’s take a look at the contents of this file.
import { useBlockProps } from '@wordpress/block-editor';

export default function save() {
	return (
		<p { ...useBlockProps.save() }>
			{ 'Ray Design Block – hello from the saved content!' }
		</p>
	);
}
First we import the useBlockProps function and add it to the outer wrapping of the block. It simply adds some extra classes to it for the proper functioning of the block.
Next the save function simply returns a string to be displayed on the public facing view of the page. Whatever this function returns gets displayed on the frontend of the site. Here it is returning the string, “Ray Design Block – hello from the saved content!“
This is how it displays on the page:
The export default in front of the function name simply means that when this component is imported by another function, it is the default function to be exported.
Conclusion
It is indeed a very simple block that is put together for us when we run the command, npx @wordpress/create-block ray-design-block at the command prompt. It doesn’t do anything dynamic, but simply returns two static strings of text to be displayed.
But studying the different files, and what they do, and how they interact with each other gives us a solid understanding of what each file does. It also gives us the knowledge to further extend it now to add meaningful features to it.
Perhaps, in our next article we can work on this block to add some exciting features to deepen our understanding of Gutenberg blocks. And we can use them as our building blocks to create awesome websites.
Don’t forget to leave your feedback or questions in the comments below.